Notebook / Archives / "making-of"

"making-of" entries.

May 02, 2003

New RSS feed for “The Making-Of”

I have created a new RSS 2.0 feed for my series of “making-of”. If you want to stay tuned with these tutorials, there is only one file: making-of.xml.

Posted by Jean-Philippe on May 02, 2003 10 Comments, 256 TrackBacks

The Making-Of a Blog: dropping shadows

Today I wanted to be able to drop shadows on photos. I did not succeed completely (or “automaticaly” must I say) maybe because of a bug in ImageMagick conjure command line tool. I have submited my problem to the "Magick-users" mailing-list and I hope to have an answer soon...

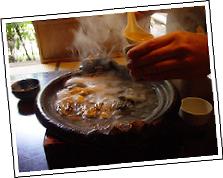
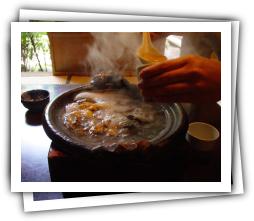
But here follows my story... I first discovered thanks to the serendipity goddess Raymond Penners' home page who wrote a script called Photo Stack for The GIMP. This script uses the Script-Fu extension mecanism incorporated in The GIMP to process an image – as a script-fu, it is written in scheme... This effect is very original cos it does not only stick a border to an image, it simulates a pile of photos. Here is an example:

In order to understand this script, you need to be quite confortable with The GIMP and to read The GIMP API Documentation. What is hard is not this API but the lisp-way of writing scripts in The Gimp! However it seems the day is coming when we will be able to use The GIMP in script like all other Unix tools, according to this answer to a message about recording Gimp actions in the "Gimp-developer" mailing-list. Here is what we can read on the GNOME Bug Tracker (powered by Bugzilla):


This feature is on the TODO list, but several important changes are
necessary before it can be implemented. The user interface must be
separated from the core, and all actions performed via the GUI must
result in corresponding PDB calls. Once this is done, then all
actions invoked through the menus, all brush strokes, selections and
other actions will go through the PDB where they can be caught and
recorded in a file. Then it should be easy to export the sequence
of actions as a Script-Fu or Perl-Fu script.

This feature will probably be implemented in Gimp 2.0.


Wooo... I would be very happy to be able to write XML descriptions of processings to do on images with The GIMP!
Ok, I go on. I decided to stop studying this script (I will be back to it when I will be able to drop shadows with ImageMagick, converting it to a PerlMagick script maybe).

So I decided to explore ImageMagick mailing-lists to learn more about the conjure tools and maybe to find information about dropping shadows. The main answer is that conjure is really not wide diffused in the ImageMagick community and there is in fact no documentation. For example I learned that you can compose images (XML scripting version of the composite command line tool) in this thread about handling groups of images in a MSL file; there are other tips in this thread dealing with undocumented functions of conjure.

On the effect sire, I first found this thread about dropping shadows with PerlMagick but the result did not look very good. Hopefuly searching on Google I found in the "Gimp-user" mailing-list this message describing how to drop shadows with ImageMagick “like in Adobe Photoshop”; but the explanation was a bit too Gimp-oriented. I was finaly helped by the "Magick-users" mailing-list with the conclusion of a thread about dropping shadows in ImageMagick, answering this question describing the steps needed for this effect:


  1. get the original image;

  2. create a black image having the same size than the original;

  3. add a 5x5 blur to the black image;

  4. combine the original image over the black one offset right 5 down 5;

  5. set the background color of the result image.


Using options from ImageMagick, the only difficult part is the 5x5 blur. In fact, after producing the black image, we must add a 20x20 white border, apply a 0x3 gaussian blur (radius=0, sigma=3) and shave the image by 15x15: we get a (20x20)-(15x15)=5x5 blur!
My actual MSL script doing this job and submitted to the "Magick-user" mailing-list is here (with different parameters for the blur: radius=0, sigma=4):

<?xml version="1.0" encoding="UTF-8"?>
<group id='photo' >
<image id='img' >
<read filename="%[f].jpg" />
<border fill="white" width="10" height="10" />
<write filename="tmp_img.miff" />
</image>
<image id='tmp'>
<read filename="tmp_img.miff" />
<get width="base-width" height="base-height" />
</image>
<image id='shadow'
   size="%[base-width]x%[base-height]" color="black" >
<border fill="white" width="20" height="20" />
<blur radius="0" sigma="4" />
<shave geometry="15x15" />
<write filename="tmp_shadow.miff" />
</image>
<image>
<read filename="tmp_shadow.miff" />
<composite image="img"
   compose="over" gravity="center" geometry="-4-4" />
</image>
<write filename="%[f]_photo.jpg" />
</group>

Is does not work cos the value "center" for the attribute gravity seems to be not processed.
Finishing the job with a little fix batch script, I get:

composite -gravity "center" -geometry "-4-4" -compose "over"
   tmp_img.miff tmp_shadow.miff %1_shadow.jpg
mogrify -rotate "-5" %1_shadow.jpg
mogrify -resize "200x" %1_shadow.jpg


Cool, isn't it?... and very close to what I wanted in my previous tutorial: I lack only a wider and lighter shadow! You can see too that I have nomore problems with aliasing cos I make the resizing after the skewing. For example, here is the old photo effect with a new little border of 1 pixel and a white border of 20 pixels:

This is the end for the moment. I am waiting for an answer to know if I am stupid or if it is conjure which is bugged. I need too to investigate a recent articles on "LinuxWorld.com", entitled “Adding eye candy to your desktop” and dealing with dropping shadows onto icons with PerlMagick.
After this affair, I will publish complete batch files and scripts, documented and with more configuration parameters.

Posted by Jean-Philippe on May 02, 2003 27 Comments, 922 TrackBacks

April 29, 2003

The Making-Of a Blog: adding a photo-like border to your images

After reading this entry from Paolo Valdemarin about Food blogging (more info here in a previous entry) and watching the beautiful photo effect, I wanted to do the same thing.

I tried to mimic the effect with the command line tools conjure from ImageMagick (a collection of tools and libraries to manipulate images) which can process a Magick Scripting Language (MSL) file – conjure is useful to accomplish custom image processing tasks without using PerlMagick for example (PerlMagick is the Perl binding to ImageMagick). Apart ImageMagick, you will need the XML parser which comes with Libxml2 (The XML C library for Gnome); you can find the Windows port on Igor Zlatkovic's website (on the page where you can download binaries, do not forget to get iConv if you do not want to be reminded by conjure that you lack a library). After theses downloads, you must modify the path to point to the two new libraries.

To accomplish this effect, I wanted to take a JPEG file f.jpg to get another JPEG file f_photo.jpg (without needing to add the file extension):


  1. resize the original image to get a width of 200 pixels;

  2. add a white border of 4 pixels;

  3. add a black border of 1 pixel;

  4. rotate the image by -5 degrees.


Here is my MSL file:

<?xml version="1.0" encoding="UTF-8"?>
<image>
<read filename="%[f].jpg" />
<resize geometry="200x" />
<border fill="white" width="4" height="4" />
<border fill="black" width="1" height="1" />
<rotate degrees="-5" />
<write filename="%[f]_photo.jpg" />
</image>

You can interpret this doeffect_photo.msl XML script and see the result on Windows using IMDisplay with the following batch file:

@echo off
conjure -f %1 doeffect_photo.msl
imdisplay %1_photo.jpg

My result:

As you can see, I have two main problems. First, the image is aliased and it seems you cannot script an antialiasing inside a MSL file (and I have many problems today with convert and as always with mogrify – the first reason I am using an MSL script is that I do not succeed using these tools :( ). Secondly, I absolutely do not know how to make this shadow effect which gives a relief to the image.
I have to explore further. But I think it could be easier with the Perl binding.

Posted by Jean-Philippe on April 29, 2003 31 Comments, 1135 TrackBacks

April 28, 2003

The Making-Of a Blog: displaying your online status

It could be very useful to display your online status on your weblog, that is to say which instant messaging network you are connected on when someone is visiting your website.
Almost all instant messaging companies are providing tools to actually perfom that job:


  • ICQ offers the more powerful tools, "The ICQ Web Tools" which are covering many aspects of the ICQ network. Among these tools, there are "The ICQ Panels", which provide “basic ICQ features to empower your site, while each panel has unique features & design to fit your site perfectly”. On this page you can easily find "The ICQ Status Indicator", with actually ten different designs. For example, if you want a soft and little ICQ status indicator, you just have to add the following HTML code in your webpage, where the indicator must appear:

    <img src="http://web.icq.com/whitepages/online
       ?icq=[your_icq_number]&img=5">


  • AOL Instant Messenger (AIM) only provide the "AIM Remote", a way to add an AIM communication center to your website (a panel to contact you by instant messaging or email, to join your chat room, etc.).

  • Yahoo! just offers an online presence tools for its Yahoo! Messenger. Here is the HTML code if you want to compare it with ICQ's one:

    <a href="http://edit.yahoo.com/config/send_webmesg?
       .target=[your_yahoo_id]&.src=pg">
    <img border=0 src="http://opi.yahoo.com/online
       ?u=[your_yahoo_id]
       &m=g&t=2"></a>


  • Microsoft does not provide a MSN/Windows Messenger presence tools. This is a strange situation because the Hotmail email service displays your friends' online status if you have received emails from them...

So as you can see, you will have much work to do for a result which won't look homogeneous. Hopefuly here comes the Online Status Indicator, OSI for intimates! This is a service which allow you to display a small image on your website to show if you are online (OSI can handle ICQ, MSNm, AIM, Y!M and Jabber – there are icons for Trillian but the OSI server uses the ICQ account in order to detect your presence). You can use the default icon (the one on the OSI server) or create your own for online and offline status. You can too host yourself an OSI server (written in Java): all you need is a permanent internet link.
I see two main servers with different icons: "lifelesspeople.com" (actually down) and "inkiboo.com" (more servers on the OSI WebRing).
You will have to create each icon separatly: you must select the medium (the instant messaging network), fill the user id (your id on this IM network) and the addresses to online and offline icons (it's a good idea to put them on your website to minimize the loading time of your page).

Example of the HTML code needed for AIM (note that the online and offline adresses for icons must not contain "http://"):


<!-- Begin Online Status Indicator code -->
<!-- http://www.onlinestatus.org/ -->
<A HREF="aim:goim?screenname=[your_aim_pseudo]">
<IMG SRC="http://status.inkiboo.com:8080/aim/[your_aim_pseudo]
   /onurl=[address_to_online_icon]
   /offurl=[address_to_offline_icon]"
border="0"
   ALT="Online Status Indicator"></A>
<!-- End Online Status Indicator code -->

If you put like me your online and offline icons in media/images/im_osi_icons/ with respective names aimonline.gif and aimoffline.gif, using Movable Type variables (MTBlogHost to get the hostname of your blog and MTBlogRelativeURL to get its relative URL), you have (using lower case tags and a more meaningful “AIM Online Status Indicator” for the alt tag):

<!-- Begin Online Status Indicator code -->
<!-- http://www.onlinestatus.org/ -->
<a href="aim:goim?screenname=[your_aim_pseudo]">
<img src="http://status.inkiboo.com:8080/aim/[your_aim_pseudo]
   /onurl=<$MTBlogHost$><$MTBlogRelativeURL$>
   /media/images/im_osi_icons/aimonline.gif
   /offurl=<$MTBlogHost$><$MTBlogRelativeURL$>
   /media/images/im_osi_icons/aimoffline.gif"
border="0"
   alt="AIM Online Status Indicator"></a>
<!-- End Online Status Indicator code -->

Repeating this process for all your favorite instant messaging networks, you get:

<!-- Begin Online Status Indicator code -->
<!-- http://www.onlinestatus.org/ -->
<a href="http://status.inkiboo.com:8080/message/icq/[your_icq_number]">
<img src="http://status.inkiboo.com:8080/icq/[your_icq_number]
   /onurl=<$MTBlogHost$><$MTBlogRelativeURL$>
   /media/images/im_osi_icons/icqonline.gif
   /offurl=<$MTBlogHost$><$MTBlogRelativeURL$>
   /media/images/im_osi_icons/icqoffline.gif"
border="0" alt="ICQ Online Status Indicator">
</a>
<a href="http://status.inkiboo.com:8080/message/msn/[your_msn_id]">
<img src="http://status.inkiboo.com:8080/msn/[your_msn_id]
   /onurl=<$MTBlogHost$><$MTBlogRelativeURL$>
   /media/images/im_osi_icons/msnonline.gif
   /offurl=<$MTBlogHost$><$MTBlogRelativeURL$>
   /media/images/im_osi_icons/msnoffline.gif"
border="0" alt="MSNm Online Status Indicator">
</a>
<a href="aim:goim?screenname=[your_aim_id]">
<img src="http://status.inkiboo.com:8080/aim/[your_aim_id]
   /onurl=<$MTBlogHost$><$MTBlogRelativeURL$>
   /media/images/im_osi_icons/aimonline.gif
   /offurl=<$MTBlogHost$><$MTBlogRelativeURL$>
   /media/images/im_osi_icons/aimoffline.gif"
border="0" alt="AIM Online Status Indicator">
</a>
<a href="ymsgr:sendIM?[your_yahoo_id]">
<img src="http://status.inkiboo.com:8080/yahoo/[your_yahoo_id]
   /onurl=<$MTBlogHost$><$MTBlogRelativeURL$>
   /media/images/im_osi_icons/yahooonline.gif
   /offurl=<$MTBlogHost$><$MTBlogRelativeURL$>
   /media/images/im_osi_icons/yahoooffline.gif"
border="0" alt="Y!M Online Status Indicator">
</a>
<!-- End Online Status Indicator code -->

In conclusion I can say that I am very impressed by the Online Status Indicator, particularly the click-and-contact functionality: if you click on one of the presence icons while having your instant messaging client opened, you will be able to send a message to your contact (for AIM and Y!M, using their respective protocols via a web link, generating the appropriate data flow via the OSI server for ICQ and MSMm).

However I think a complete hosted-on-your-MTBlog Perl solution could be nicer. But this is another story I would tell to you later this year...

Posted by Jean-Philippe on April 28, 2003 36 Comments, 253 TrackBacks

Introducing “The Making-Of a Blog”

This week I will start to publish on this weblog a series of entries entitled “The Making-Of a Blog”. After weeks of reading blogs and design tips for websites, I think it is time to write entries about the way I am conducting the design of my website.
For the moment, this site does not successfuly display itself on every browsers. It's a problem but I need to find a lot of time to correct the templates. Even the design of this site will soon dramaticaly change.
I will begin my series of tutorials explaining how to add functionalities like resume, calendars, archives, syndication and metadata handling, referers, photo bars and other cool features... I will try to use the better methods to produce a clean result, always refering to the best weblogs around. The first blog I saw which made me scream: “What an amazing design!” is owned by Kevin Lynch; so you are right if you think that the design of my blog came from him.
Kevin Lynch was mainly inspired by Jason Kottke (kottke.org) for the linking icons and by Jeffrey Veen's weblog for the general design (a top bar with your name, a right side bar with your personal info, like the Meg Hourihan's weblog "megnut.com"). For the name of my blog, I choosed to sound like the well known (although incredible) "Russell Beattie Notebook".
However you will see at the end that my influences are numerous...

Many of these tips will find their room in my upcoming PHP book about group-blogging.

Posted by Jean-Philippe on April 28, 2003 108 Comments, 1247 TrackBacks

Entries on this page

Entries by category

Entries by month